I love using discovery bottles for science. They allow students to experiment and observe with zero mess, setup or cleanup! I am busy gathering LOTS of ideas for you because I know that you are going to love them, too. I use a piece of posterboard on the table for students to record their observations, instead of a piece of paper, like a classroom teacher would use. Take a little bit of time to make these, then enjoy them for the next few years!
(The first three photos on this page are used with permission from Reagan Tunstall of Tunstall’s Teaching Tidbits.)
Static Electricity Bottles
Fill one of your sturdy clear bottles with colorful squares of tissue paper. Students rub these against their clothing, and then observe the bottle. They should see the tissue paper sticking to the bottle at the place where they rubbed the bottle on their clothes.
Ocean Discovery Bottles
Fill the bottle halfway with water, one fourth with cooking oil, then add blue food coloring. Students can roll it around to make waves, and can see what happens when oil spills in the ocean.
Density Discovery Bottles
Make at least two density bottles so that students can compare them. Place three marbles in the bottom for students to observe. You can put something sparkly like star sequins in there for fun, if you’d like. Fill one with light Karo syrup, and the other with shampoo, hair gel, body wash, or something similar that is thick but transparent. Students compare how the marbles move through the unknown liquid.
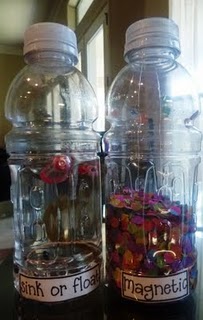
Sink or Float Bottle
Fill this bottle halfway with water. Put an assortment of objects in here, making sure you have some that sink and some that float. Students record their observations of what type of object sinks and which objects float.
Buoyancy Bottle
Fill your bottle about three-quarters full of water, coloring with several drops of food coloring if you’d like. Blow up two balloons a little bit, tie them off so the air stays in, draw a face on with a Sharpie (if you choose to), and put them in the bottle. Make sure you have the words buoyant and buoyancy written prominently on the observation sheet, so your students get a grasp of the concept.
Sandy Magnetic Bottle
Put sand in one of your bottles. Then add iron filings. Students use a magnetic wand to run along the outside of the bottle and attract the iron filings.
Estimation Bottle
Partially fill your observation bottle with small objects like beans, nuts, rocks, or something related to your instructional focus. Have students write down their estimates of how many are in the bottle on the observation poster. Next week, post the results, with a bookmark to the best estimator!
Bubble Bottle
Into the bottle, put a cup of water, a squirt of dish detergent, and several drops of food coloring. Students can shake the bottle to make bubbles.
Sprout Bottle
Place a wet sponge on the bottom of the observation bottle. Sprinkle fast growing seeds (like grass seeds) on the sponge. Seal the lid, and have students draw dated observations of what happens in the bottle.
Erosion Bottles
Small rocks in water, with the lids hot glued on the bottles. Students shake the bottles to simulate the forces of erosion breaking the rocks into soil. This is noisy, but the kids with extra energy (do you have any of these?) love it! (Hint: if the small rocks are a little dirty, there will be some small particles swirling around in the water to encourage your students.)
Do you have more ideas for science discovery bottles? Please share!


Hi Cari,
Thanks so much for sharing about the discovery bottles! I appreciate the shout out for the pictures. Looks like you have done a lot of research and have a lot of great info.
Take Care,
Reagan
Thank you, Reagan!